28 February 2011

February hauls :)

This month my hauls are unusually small! Only 7 polishes and some nail art stuff! Look:
W tym miesiącu moje łupy są wyjątkowo małe! Tylko 7 lakierów i trochę drobiazgów, patrzcie:


These are my own shopping:
To są moje własne zakupy:
 
♣ China Glaze Crackle - Fault Line
♣ China Glaze Crackle - Crushed Candy
♣ Essence Colour&Go - 25 Glisten up!


      And the gifts from Sabbatha:
      I prezenty od Sabbathy:

      ♣ Fontana Contarini - 75 - (from Smalto)
      ♣ p2 Crackling Top coat - 020 Silver Blast
      ♣ Zoya - Ki (birthday gift *.*)
      ♣ Vipera Jumpy - 140


          And my prize from Chinese New Year Nail Art Contest :) There is some buffer, rhinestones, fimos, dotting tool etc. :)
          ~~~~~~~~~~
          I moja nagroda z konkursu Chiński Nowy Rok :) Jest tu m.in. polerka, diamenciki na paznokcie, fimosie, sonda itd... :)

          27 February 2011

          Our 4th anniversary ♥

          Today is very important day for me and my boyfriend. It's our fourth anniversary!
          Our start was complicated, I'm sure that director of some soap opera would love to buy our history ;)
          Now we are really happy, loving each other like no one else. 
          And we are planning our common future, but it won't be easy - we'll survive!
          Anyway, you can see our silver rings bought for this anniversary - picture above.
          And I made a little mix of photos, taken in the last 4 years :) 
          ~~~~~~~~~~~~
          Dziś jest bardzo ważny dzień dla mnie i dla mojego ukochanego - nasza czwarta rocznica!
          Nasze początki były skomplikowane, daję głowę, że jakiś producent telenowel wiele by dał za prawa do ekranizacji ;) Teraz jesteśmy ze sobą bardzo szczęśliwi, wiele razem przeszliśmy...
          I planujemy wspólną przyszłość, choć będzie ona trudna - damy radę!
          W każdym razie powyżej możecie podziwiać nasze rocznicowe obrączki ;)
          No i zrobiłam małą sklejkę naszych zdjęć z ostatnich 4 lat ;)

          26 February 2011

          IsaDora Graffiti Nail Top - 802 White Art - crack!


          This is the next polish bought because of Sabbatha, on Allegro (Polish eBay). I've always wanted to get white crackling polish and this one is just great - I like this shatter effect, it's so pretty! And the brush is wide and flat, so you can paint your nail very fast - what is good, cause IsaDora starts to crackle almost immediately after applying. Here it's covered over China Glaze - Spontaneous.
          ~~~~~~~~~~~~~~
          Oto kolejny lakier, który kupiłam za namową Sabbathy na Allegro. Zawsze chciałam mieć biały pękający lakier, a ten jest naprawdę super - podoba mi się efekt, jaki daje, jest bardzo oryginalny. A pędzelek jest płaski i szeroki, dzięki czemu można szybko pomalować pazurka - co jest ważne, bo lakier zaczyna pękać niemal natychmiast po nałożeniu na paznokieć. Tu bazą jest China Glaze - Spontaneous.

          25 February 2011

          Old mani with 3 China Glazes! (Nail Art)


          It's a pretty old manicure, I didn't have an occasion to publish it earlier. I'm sad when I'm looking at my old long nails - today I had to cut them again! I made this mani to try my 3 first China Glazes - base are Grape Pop (darker) and Spontaneous (lighter), stamped with Light as Air and Konad plate No. M65.
          ~~~~~~~~~~~~~~
          To dość stary manicure, jakoś wcześniej nie miałam okazji go publikować. Smutno mi, gdy patrzę na te moje długie pazurki tutaj - zwłaszcza, że dziś musiałam je jeszcze bardziej skrócić... Ten mani zrobiłam, żeby wypróbować moje pierwsze lakiery China Glaze - baza to Grape Pop (ciemniejszy) i Spontaneous (jaśniejszy), postemplowane z użyciem lakieru Light as Air i płytki Konad nr M65.

          24 February 2011

          China Glaze - Spontaneous

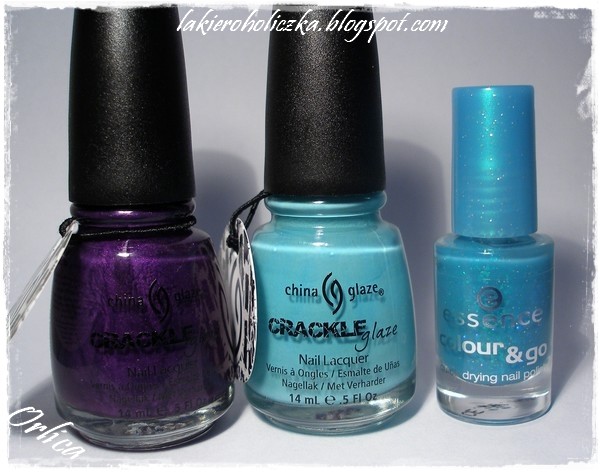
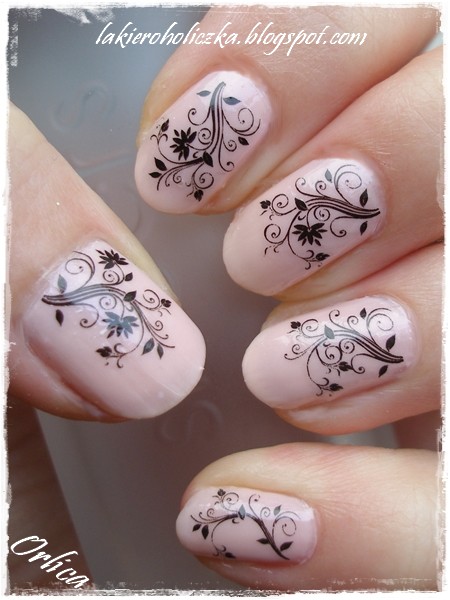
           When I saw this polish on some blog first time, I knew it's my new must-have. I saw a comparison of this one and Essence MultiDimension - 58 The One and Only, which is my beloved polish. They looked the same, so I started to dream about my favourite colour in the better version - The One and Only isn't the best polish from Essence... When I finally got it, they turned out to be completely different and it was a disappointment, if I have to be honest. They are similar, but Spontaneous is darker and more vivid. In the first moment, I didn't like it, but when I saw it next morning, I thought: "Damn, it's so pretty!". The most "real" colour is caught in the third picture - it's hard to catch purples on the photos in the daylight, right? My photos (first and second) are improved in Corel, but as I wrote - the truest shade is on the third one. I've got two coats on my nails. Application is pretty comfortable - no streaks, no bubbles, no gaps. And I love this good quality - it's 6th day when it's on my nails! With no chips! I can repeat it all the time - China Glaze is the best nail polish brand. 
          Oh, you had to missed my long and regular posts :P Today I've just finished my exam session (I hope so ;)) and now I've got more time for blogging :) Yeah, what a relief - to have all of these exams behing me... My grades aren't great, but I did my best and I think I have a reason to be proud of myself ;) It was my first semester on the university!
          ~~~~~~~~~~~~~~
           Kiedy zobaczyłam ten lakier po raz pierwszy na jakimś blogu, wiedziałam, że to mój nowy must-have. Widziałam porównanie tego lakieru z Essence MultiDimension - 58 The One and Only, który jest moim ukochanym kolorem, wyglądały identycznie, więc zaczęłam marzyć o lepszej wersji ulubionego lakieru - The One and Only nie należy do najlepszych z Essence pod względem jakości... Kiedy wreszcie go zdobyłam, okazał się być zupełnie inny, a to było dla mnie rozczarowanie, jeśli mam być szczera. Są podobne, ale Spontaneous jest ciemniejszy i żywszy. W pierwszej chwili nie spodobał mi się na paznokciach, ale kiedy spojrzałam na nie następnego ranka, pomyślałam "Kurczę, jaki on śliczny!". Najlepiej kolor wyszedł na trzecim zdjęciu - trudno jest złapać fiolety w świetle dziennym, prawda? Moje dwa pierwsze zdjęcia są poprawiane w Corelu, ale jak pisałam - nadal najwierniej oddany jest na trzecim zdjęciu. Na paznokciach mam dwie warstwy. Aplikacja jest całkiem wygodna, bez smug, bąbelków, prześwitów... Uwielbiam tę jakość - noszę ten lakier na paznokciach już szósty dzień, bez żadnych odprysków! I będę to powtarzać - China Glaze jest najlepszą firmą lakierów do paznokci!
          Oj, musiałyście tęsknić za moimi długimi i regularnymi postami :P Dziś zakończyłam wreszcie sesję (mam nadzieję ;)) i mam więcej czasu na blogowanie :) Uff, co za ulga - mieć wszystkie egzaminy i kolokwia za sobą... Moje stopnie nie są może rewelacyjne, ale dałam z siebie wszystko i myślę, że mogę być z siebie dumna ;) Zamknęłam pierwszy semestr na studiach! :)

          22 February 2011

          Under the sea... (Nail Art)

           As I already wrote a few times, I love Essence's polishes, I have a lot of my favourites from this brand. For this manicure I used only Essence products. The base colour is Essence Colour&Go - 24 Underwater, on the tips is Essence Colour&Go - 38 Choose me!, and on the edges - Essence Colour&Go - 25 Glisten Up!.
          Maybe you can see there's something wrong with these pics... I've tried to use Corel PhotoPaint (I'm not a master of this program...) to correct colours and shades and I think it works, but I don't now why, but after saving the new version of them, quality was worse. I had to be something in saving settings... Well, now I will be more careful ;)
          ~~~~~~~~~~~~~~
          Jak już kilka razy pisałam, uwielbiam lakiery Essence, wiele z nich należy do ścisłego grona moich ulubionych. Dlatego też, do tego manicure'u użyłam tylko lakierów tej firmy. Lakier bazowy to Essence Colour&Go - 24 Underwater, na końcówkach jest Essence Colour&Go - 38 Choose me!, a "u nasady" - Essence Colour&Go - 25 Glisten Up!
          Może zauważyłyście, że coś jest nie tak z tymi zdjęciami... Próbowałam swoich sił z Corelem PhotoPaintem (dopiero zaczynam poznawać ten program...), żeby poprawić kolory itd, i myślę, że to mi się udało, ale nie wiedzieć czemu, po zapisaniu nowych wersji zdjęć okazało się, że ich jakość się znacznie pogorszyła. Musiałam przeoczyć coś w ustawieniach przy zapisywaniu... Cóż, na przyszłość będę mądrzejsza i wszystko sprawdzę, zanim zapiszę ;)

          21 February 2011

          Essence Colour&Go - 24 Underwater

           It's the second version of this polish, the first one was much lighter and vivid. But I like this one :) It's dark navy with blue sparks - a small glass-flecked. They are visible in the bottle, but it's hard to see them on the nails... I catched them on the second photo. This polish is onecoater - I love that! It's pretty good, but may create some bubbles - I can see about 3 or 4. 
          ~~~~~~~~~~~~
          To druga już wersja tego lakieru - pierwsza była jasnym, dość jaskrawym błękitem. Ja jednak wolę tę wersję. To ciemny granat z niebieskimi iskierkami - drobnym efektem glass-flecked, widocznym w butelce, na paznokciach już niestety mniej... Złapałam te drobinki na drugim zdjęciu. Ten lakier to jednowarstwowiec - co uwielbiam w lakierach! Jest całkiem niezły, ale może robić pojedyncze pęcherzyki, ja doliczyłam się 3 czy 4, nie jest więc tragicznie.

          20 February 2011

          Joko Vinyl Mania - 65 Purple Rain

           Well, I have NO idea, why it's called Purple Rain. This colour is raspberry - red with some pink or purple admixture, but definitely it's NOT purple... And to be honest - I don't like it. It's one coater, but as you can see, there's some bubbles, and my natural grooves on nails are still visible. Don't look at my pinkie - I had a little accident... 
          And I had a crisis yesterday. I dropped my beauty school, and I didn't write any post!
          Isn't it just terrible?! ;)
          ~~~~~~~~~~~~
          Cóż, nie mam zielonego pojęcia, dlaczego ten lakier nazywa się Purple Rain. Kolor to malinka - czerwień z odrobiną różu czy fioletu, ale zdecydowanie NIE fiolet... I szczerze mówiąc - nie podoba mi się. To jednowarstwowiec, ale jak widzicie, tworzy pęcherzyki powietrza, a moje naturalne bruzdy w paznokciach nadal są mocno widoczne. Nie patrzcie na mały pazurek - miałam drobny wypadek...
          A wczoraj miałam kryzys... Rzuciłam szkołę kosmetyczną i nie napisałam notki!
          Czyż to nie strasznie?! ;)

          This product was sent to me for review.

          18 February 2011

          TUTORIAL @ Rays Manicure!


          Hi! Today I want to show you a little and simple tutorial, how to make rays manicure. I saw it on this blog and I HAD to try it as soon as possible ;) This method is for me really ingenious and makes so many possibilities to decorate our nails! So, let's take a look for these steps below:
          ~~~~~~~~~~~~~~~~~~~~~~~~
          Hej, dziś chcę Wam pokazać krótki i prosty tutorial, jak zrobić "Rays manicure". Widziałam to na tym blogu i MUSIAŁAM wypróbować od razu ;) Jak dla mnie tak metoda jest naprawdę pomysłowa i daje nam mnóstwo możliwości w dekorowaniu pazurków! Spójrzmy więc na "instrukcję" poniżej:

           You have to prepare:
          - Holo/glitter polish (light)
          - Well covering polish (dark)
          - Wallpaper sticky tape (paper)
          - Top coat and scissors
          ~~~~~~~~~~
          Musisz przygotować:
          - Holo/brokatowy lakier (jasny)
          - Kryjący lakier (ciemny)
          - Taśmę do tapet (papierową)
          - Top coat i nożyczki


          Paint your nails with your light holo or glitter.
          ~~~~~~~~~~~~
          Pomaluj pazurki jasnym holosiem albo brokatem.


           Take a wallpaper sticky tape (it should be paper and easy to take it off) and cut it for thin stripes. It could be straight or sharpened, as you prefer.
          ~~~~~~~~~~~~
          Weź taśmę klejącą do tapet (chodzi o to, żeby była papierowa i łatwo się odklejała) i potnij ją na cienkie paseczki - proste albo zaostrzone, jak wolisz.


          Place these strips on your nails just like in the picture. Leave some free parts of strips to take it off in one of the next steps.
          ~~~~~~~~~~~~
          Umieść paseczki na paznokciach tak, jak na zdjęciu. Zostaw część pasków wolne, żeby można było je zdjęć w jednym z kolejnych kroków.


          Paint your nails with this well covering dark polish. Be careful and fill the spaces around the strips. Don't mind a mess on your cuticles ;)
          ~~~~~~~~~~
          Pomaluj paznokcie ciemnym kryjącym lakierem. Dokładnie wypełnij przestrzenie między paseczkami. Nie zwracaj uwagi na bałagan, jaki robi się na skórkach ;)


          Wait until polish will be a little more dry and then peel the stripes off. Then clean your cuticles up - I use a flat short brush dipped with remover. For the end, use a top coat.
          ~~~~~~~~~~~~
          Poczekaj, aż lakier troszkę wyschnie i delikatnie odklej paseczki. Wtedy wyczyść skórki dookoła - ja używam krótkiego płaskiego pędzelka zamoczonego w zmywaczu. Na koniec, użyj top coatu.


          It's so easy and striking, right? :D I hope you like this short tutorial ;) 
          If you will try this method and want to share the effect with us - just send me a photo on orlica91[at]wp.pl :)
          ~~~~~~~~~~~
          To takie proste i efektowne, prawda? :D Mam nadzieję, że spodoba Wam się ten malutki tutorial. 
          Jeśli wypróbujecie tę metodę i będziecie chciały się z nami podzielić efektami, po prostu wyślijcie mi fotki na maila orlica91[at]wp.pl :)

          17 February 2011

          You are my rays! (Nail Art)


           There's something different for today. For this mani I haven't used any stamps, any brushes, any stickers, just a sticky tape. It's really easy, but tomorrow I will show you a little tutorial. And I have to say it now - it's not my idea, I have found it on some blog, a great blog actually - Chloe's Nails. Silver holo is Catherine Arley - 667, covered with LA Girls Rockstar - Heavy Metal.
          ~~~~~~~~~~~~~~~~~~
          Na dziś mam dla Was coś innego. Do tego mani nie użyłam żadnych stempli, pędzelków czy naklejek, tylko taśmę klejącą. To naprawdę łatwe, ale jutro pokażę Wam krótki tutorial. I muszę napisać to już teraz - to nie mój pomysł, znalazłam go na pewnym blogu, właściwie pewnym świetnym blogu - Chloe's Nails. Srebrne holo to Catherine Arley - 667, pokryte LA Girls Rockstar - Heavy Metal.

          16 February 2011

          Catherine Arley - 667 - holo

           Today I want to show you one of my five Catherine Arley's holos :) I picked this one, cause it seemed to be subtle, but with a strong holo effect (in comparison with another polishes from this brand). And well, I like silver ;) It's not so covering as I want, but three coats are enough - they make this effect like in the pictures. First and second photos are made in the artificial light, under a lamp, the third - in the daylight, with no sun. Application is pretty comfortable - but what problems can it make? ;) It's really thin polish. 
          ~~~~~~~~~~~~~~~~~
          Dziś chcę Wam pokazać pierwszy z pięciu moich holosiów Catherine Arley. :) Wybrałam ten, bo wydawał się delikatny, a jednocześnie z dość mocnym efektem holo (w porównaniu do innych lakierów z tej piątki). No i cóż, lubię srebro ;) Nie jest tak kryjący jakbym tego chciała, ale trzy warstwy wystarczają - dają taki efekt, jaki widzicie na zdjęciach. Pierwsze i drugie są robione w sztucznym świetle, pod lampką, a trzecie w świetle dziennym, ale bez słońca. Aplikacja jest całkiem wygodna - bo jakie problemy może sprawiać taki lakier? ;) Jest dość rzadki.

          15 February 2011

          Catherine Arley - holo skittles!

          I remember this huge "BOOM" when they have appeared on some blog first time. Of course I'm talking about Catherine Arley's holos :) They are great, they are cheap, they are almost unavailable... A few Polish girls and I ordered them from Bulgarian store, but shipping was just terrible - without any bubble foil etc... Only about 75% of ordered polishes were in one piece, when we got them, the rest was broken. I won't recommend this store to anyone, never. I you want them, find some nice person from Bulgaria, don't order them from this store! It's probably my first negative opinion about store, I don't demand too much. I was lucky, cause all of my five polishes are still alive and you can see them here in the picture. They are great, even though the holographic effect isn't too strong. I will show them as the individual swatches, which one do you want to see the most?
          ~~~~~~~~~~~~~~~~
          Pamiętam, jak wielki "BOOM" spowodowało pojawienie się tych lakierów na jakimś blogu po raz pierwszy. Mówię oczywiście o holosiach Catherine Arley. :) Są świetne, są tanie, są niemal niedostępne... Razem z kilkoma polskimi lakieromaniaczkami złożyłyśmy wielkie zamówienie na te lakiery w bułgarskim sklepie, ale przesyłka była po prostu koszmarna - paczki bez żadnego zabezpieczenia, nawet bez folii bąbelkowej... Przetrwało w jednym kawałku tylko ok. 75% zamówionych lakierów, reszta zwyczajnie popękała. Nigdy nikomu nie polecę tego sklepu! To chyba pierwszy raz, kiedy piszę tak negatywną opinię o sklepie, nie wymagam dużo... Tym razem ja miałam farta, wszystkie z pięciu zamówionych przeze mnie lakierów ocalały, a teraz możecie je podziwiać na zdjęciach. Są super, nawet mimo faktu, że efekt holo nie jest zbyt mocny. Będę je pokazywać w oddzielnych swatchach, którego jesteście najbardziej ciekawe?

          14 February 2011

          Alternative Valentine's Day! (Nail Art)

          I'm just fed up with all these pinks, reds, hearts and cute manis, so I decided to make some not really Valentine this year ;) I took two greeny polishes - mint and emerald - and combined them :) I like mani like this, with two colours in turns. Mint is Sinful Colors - Mint Apple, emerald is Sinful Colors - Rise and Shine. I've stamped it with Konad plate No. M73 and Italian Beauty french polish, with my favourite image ;) How do you like this variant for Valentine's Day?
          ~~~~~~~~~~~~~~~
          Właściwie to mam dość wszystkich tych róży, czerwieni, serduszek i innych słodkości w paznokciach, dlatego postanowiłam zrobić coś nie do końca walentynkowego w tym roku ;) Wzięłam dwa zielone lakiery - miętowy i szmaragdowy - i połączyłam je. Lubię takie mani, gdzie dwa kolory występują na zmianę. Mięta to Sinful Colors - Mint Apple, szmaragd to Sinful Colors - Rise and Shine. Całość wystemplowałam z użyciem płytki Konad nr M73 i lakieru do frencha Italian Beauty, robiąc jeden z moich ulubionych konadowych wzorków. ;) Jak Wam się podoba taka odmiana na Walentynki? :)

          13 February 2011

          Sinful Colors - Mint Apple

           I'm a little bit disappointed with this polish. And actually, I don't know why. It's called Mint Apple and it's more green than blue. This colours is pretty, but with no soul, if you know what I mean ;) It has a pretty big shimmer or maybe very fine glass-flecked. Application is strange - it applies just like pastel! It's not well covering (I've got 3 coats), but consistency is pretty thick. First and second coats may be streaky, but beside this, there's no problem with application. Despite everything, I prefer my other mints.
          ~~~~~~~~~~~~~~
          Jestem ciut rozczarowana tym lakierem. I właściwie, nie wiem dokładnie czemu. Nazywa się Mint Apple i jest bardziej zielony niż niebieski. Kolor jest ładny, ale jakiś taki... bez duszy, jeśli wiecie, co mam na myśli ;) Ma dość spory shimmer, albo może drobniutkie glass-flecked. Aplikacja jest dziwna - jak w przypadku pasteli! Nie jest dobrze kryjący (mam 3 warstwy), ale konsystencja jest dość gęsta. Pierwsza i druga warstwa mogą być smugowate, ale poza tym nie ma problemów z aplikacją. Mimo wszystko, wolę pozostałe moje miętki.

          12 February 2011

          Rebel Nails - nail wraps - pink dots


          The next Rebel Nails' wraps! Do you like this kind of stuff? As I wrote last time: This one is from Rebel Nails and I have to tell - I like it more than Nail Rock. These wraps are softer and thinner, so it's easier to aply them on nails with no wrinkles, creases or something. And they are not so stiff, so they keep on the nails better and don't unglue. We can choose 5 from 8 sizes and fit them to our nails. Then stick on the nail edge and heat with hair dryer - below is the movie how-to from Rebel Nails' site.  I think it's a great idea for one night party, whan you have no time for painting and decorating your nails.
          ~~~~~~~~~~~~~~~~
          Kolejne "lakiery-instant" od Rebel Nails! Lubicie tego typu pierdołki? Jak pisałam już ostatnio: Te są z Rebel Nails i muszę powiedzieć, że są lepsze niż te z Nail Rock. Rebelsowe są bardziej miękkie i cieńsze, więc łatwiej jest dopasować je do płytki paznokcia bez "zmarszczek", zagniotków itd. Nie są też tak sztywne, dzięki czemu lepiej trzymają się na paznokciu, krańce się nie odklejają. Możemy wybrać 5 z 8 rozmiarów i dopasować je do swoich paznokci. Wtedy doklejamy u nasady pazurka i ogrzewamy suszarką do włosów - poniżej filmik ze stronki Rebel Nails. Myślę, że to świetny patent na wieczorną imprezę, kiedy nie mamy czasu na ładny ozdobny mani.

          This product was sent to me for review.

          11 February 2011

          Some sponge, some dots :) (Nail Art)

          Some time ago I've found out how similar are these two polishes - China Glaze - Light as Air and Essence Colour&Go - 27 No more drama. Of course, Essence is much darker, but they are the same in the tonality - and I love them both ;) So I sponged a half of each nail with Essence and used dotting tool to make dots in this colour. Then I took white polish - Italian Beauty - and sponged again makind french tips and more dots. How do you like the final effect? :)
          ~~~~~~~~~~~~~~
          Jakiś czas temu zauważyłam, że te dwa lakiery są bardzo podobne - China Glaze - Light as Air i Essence Colour&Go - 27 No more drama. Oczywiście Essence jest znacznie ciemniejszy, ale są w tej samej tonacji - i kocham je oba ;) "Wygąbkowałam" połowę każdego paznokcia Essence, zrobiłam nim też kropki za pomocą sondy. Potem wzięłam biały lakier - Italian Beauty - i również gąbką zrobiłam frencha i więcej kropeczek. Jak Wam się podoba efekt końcowy? :)

          10 February 2011

          China Glaze - Light as Air

           OMG, I just love this polish! Well, like all the China Glazes I've ever used. It's Light as Air and colour is very light and cold shade of lavender. Exactly my type. It's pastel cream, with no shimmer or anything. Application is comfortable, two coats are enough, even for me. I'm sure it was one of my top10 polishes in 2011. I got it from Carolina as a swap - thank you, girl! :D
          I'm sorry, it's all for today - tomorrow I have really serious exam. o.O
          ~~~~~~~~~~~~
           O matko, kocham ten lakier! Cóż, jak wszystkie China Glaze, jakich do tej pory używałam... Ten to Light as Air, a kolor jest dokładnie w moim typie - bardzo jasna i dość chłodna lawenda. To pastelowy kremik, bez żadnego shimmeru ani niczego takiego. Aplikacja jest super, dwie warstwy wystarczą, nawet jak dla mnie. Jestem pewna, że to będzie jeden z lakierów na mojej liście top10 w 2011 roku. Dostałam go od Caroliny w ramach swapa - dziękuję raz jeszcze! :)
          Wybaczcie, to wszystko na dziś, jutro mam bardzo ważny egzamin...

          09 February 2011

          Nail Delights - water decals - Swirls

          The best way to decorate nails, after stamps of course, are for me water decals. They look amazing, and are easy to apply. I've got them from Nail Delights, the greatest nail art supply online store I've ever seen. I thought they will be bigger, like a whole nail, but this size is OK too. I think that everybody knows how to apply water decals? You just have to put a piece of sheet with chosen decal into the water, wait about one minute and then slide an image onto your nails. Easy and fast. It's not like a sticker, it cannot be palpable by a touch. This design what I used this time is "Swirls" and costs £1.00 - you can find it HERE. For me it's just cheap, and sooo cute :) They have a lot of another designs, even with Winnie the Pooh! :) Stay with me, I will show you more things from Nail Delights - nail foils, another decals, polish. Soon ;) 
          ~~~~~~~~~~~~
           Najlepszym sposobem dekoracji paznokci, po stemplach oczywiście, są dla mnie tak zwane water decals - są to jakby tatuaże na paznokcie ;) Wyglądają świetnie, a są naprawdę łatwe w aplikacji. Te dostałam z najlepszego pazurkowego sklepu, jaki kiedykolwiek widziałam - z Nail Delights. Myślałam, że będą większe, takie na całe pazurki, ale ten rozmiar jest jest OK. Jeśli ktoś nie wie, jak się tego używa, już wyjaśniam. Wycinamy wybrany wzorek z arkusika, zdejmujemy folię i maczamy w wodzie - po około minucie wzorek można "ześlizgnąć" na paznokieć i dowolnie go na nim umieścić - potem tylko wysuszyć i pokryć top coatem. Szybkie i proste. Decalsy nie są takie, jak naklejki - nie da się właściwie wyczuć ich dotykiem. Ten wzór, który tu użyłam to "Swirls", kosztuje £1.00, czyli ok. 5zł, możecie znaleźć go TU. Według mnie to dość tanio, jak za takie śliczności. Mają tam także mnóstwo innych wzorów, nawet z Kubusiem Puchatkiem! :) Bądźcie czujne, a zobaczycie tu wkrótce więcej recenzji produktów z tego sklepu - folie, więcej decalsów, lakier, szablon... ;) 
          Baza do tego manicure'u to Barbra Colour Alike - 15 Lollipop Pink.

          This product was sent to me for review.

          08 February 2011

          Barbra Colour Alike - 15 Lollipop Pink

           It's the second "french" polish from my Barbra collection. Its name is Lollipop Pink, but this time I think it's not a good name, cause colour isn't too... lollipopy ;) It's a pale powder pink with some peach undertones and almost invisible pink shimmer - look at the third photo - shimmer is in the bottle and a little bit on my nails. Colour is really pretty! I have three coats on my nails, you can use just two if you want some more delicate effect. Application is great - if you see some bubbles it's not polish - it's base coat. All of polishes from this series are available HERE and HERE. Each of them costs 8zł - it's about 3$.
          ~~~~~~~~~~~~~~
          To drugi "frenchowy" lakier od Barbry, jaki mam w swojej kolekcji. Nazywa się Lollipop Pink i tym razem uważam, że nie jest to dobra nazwa, bo kolor w ogóle nie jest lizakowy - to blady pudrowy róż z lekkimi podtonami brzoskwinki i prawie niewidocznym różowym shimmerem - zerknijcie na trzecie zdjęcie, widać go w butelce i ciut na paznokciach. Kolor jest naprawdę ładny! Mam na paznokciach trzy warstwy, ale równie dobrze możecie użyć dwóch dla delikatniejszego efektu. Aplikacja jest świetna - jeśli zobaczycie na zdjęciach pęcherzyki w lakierze, to to wina lakieru bazowego. Wszystkie kolory z tej serii są dostępne TUTAJ i TUTAJ. Cena to 8zł + wysyłka, choć oczywiście można je też dostać w stacjonarnych sklepach.

          This product was sent to me for review.

          07 February 2011

          Rebel Nails - nail wraps - pink glitter

          Hi! Today is the time to show you another set of nail wraps what I got. This one is from Rebel Nails and I have to tell - I like it more than Nail Rock. These wraps are softer and thinner, so it's easier to aply them on nails with no wrinkles, creases or something. And they are not so stiff, so they keep on the nails better and don't unglue. We can choose 5 from 8 sizes and fit them to our nails. Then stick on the nail edge and heat with hair dryer - below is the movie how-to from Rebel Nails' site.
          ~~~~~~~~~~~~~~~~
          Hej! Dziś chcę Wam pokazać kolejne "naklejane pazurki". Te są z Rebel Nails i muszę powiedzieć, że są lepsze niż te z Nail Rock. Rebelsowe są bardziej miękkie i cieńsze, więc łatwiej jest dopasować je do płytki paznokcia bez "zmarszczek", zagniotków itd. Nie są też tak sztywne, dzięki czemu lepiej trzymają się na paznokciu, krańce się nie odklejają. Możemy wybrać 5 z 8 rozmiarów i dopasować je do swoich paznokci. Wtedy doklejamy u nasady pazurka i ogrzewamy suszarką do włosów - poniżej filmik ze stronki Rebel Nails.

           I think it's a great idea for one night party, whan you have no time for painting and decorating your nails.
          Myślę, że to świetny patent na wieczorną imprezę, kiedy nie mamy czasu na ładny ozdobny mani.

          This product was sent to me for review.

          06 February 2011

          China Glaze - DV8 - amazing holo!

           With an every next China Glaze polish I love them even more. It's definitely my favourite brand, so if you want to buy me some birthday gift (1st March :P) I would love to get some of them ^^ I have bought this one just because of Sabbatha - she forced me! But now I'm just grateful - this polish is sooo amazing! The holo effect is really strong, what you can see on the two first photos - they are taken in the artificial light (with no flash, just under the lamp). The last one is taken in the day light - looks like a normal polish, but it's just an appearance. ;) I have two coats on the Nfu.Oh Aqua Base. There's no problem with application.
          ~~~~~~~~~~~~
          Z każdym kolejnym lakierem China Glaze, coraz bardziej się w nich zakochuję. To zdecydowanie moja ulubiona marka, jeśli więc chcecie coś mi kupić na urodziny (1 marca :P), z radością przyjmę jakiś z nich ^^ Ten kupiłam za sprawą Sabbathy - zmusiła mnie! Ale teraz jestem jej po prostu wdzięczna, bo ten lakier jest niesamowity! Efekt holo jest bardzo mocny, co możecie zobaczyć na dwóch pierwszych zdjęciach - są robione w sztucznym świetle (bez flasha, pod lampką). Ostatnie zaś robione było w świetle dziennym - wygląda niemal jak zwykły lakier, ale to tylko pozory ;) Mam na paznokciach dwie warstwy na bazie Nfu.Oh Aqua Base. Nie ma żadnych problemów z aplikacją.
          Related Posts with Thumbnails